Showing posts with label Clothing. Show all posts

A New Year and Some Sewing

Happy New Year!

I've started the year with a spring clean, updating photo albums, editing my end of year home movies and very little sleep.

In November I took a solo trip to Ubud in Bali for a week. My goals for the trip were to eat, sleep, go to the spa and buy fabric. A perfect holiday! I took a day trip to Denpasar to the fabric markets and brought back lots of lovely stuff. I also couldn't help myself and ended up with 11 sarongs.. but those are slowly getting turned into clothing or things for the house too. I made up the pattern for the shorts in the bottom picture but there are plenty of free PDF patterns about on the Internet. These ones are very simple with just a zipper up the back, and they're quite high waisted. I used the rest of the fabric to make Jemima a pair, but hers are below the knee and wide in the leg.

I have a few sewing projects on the go at the moment, and all going well I'll have some time to photograph them and upload them here soon. Have a lovely day everyone.


Day 14 - Free fun & Fimo


Today started as one of those days. The kids were sick and tired of being stuck inside following a week of weather that made it too uncomfortable to go out. No matter how hard I tried I couldn't get them to agree to disagree and tempers were frayed (including mine).  Time to go out!

We had planned to do a quick trip to the park hoping that some fresh air and exercise would change their moods for the better. Then someone mentioned a walk to a cave down the road in the National Park where you can see Aboriginal hand paintings and suddenly we were on a bush walk. Half way to the cave we saw another sign to a swimming hole that we've been meaning to look at since we arrived in the mountains. Our plans changed again and we took off down some steep rocky steps.

Gosh, I'm so glad we did. We hadn't planned to visit the National Park today and we certainly hadn't planned for a swim -but with my children where there's water and a bit of sunshine someone is always going to get wet. We had the whole place to ourselves so I let them strip off to their underwear and dive in.

In seconds my tired and moody kids were happy again looking for "crystals" in the sand and splashing around in the cool water. If I'd packed sun screen and food we could have stayed all day.

With my patience restored I was in the mood for some craft this afternoon so we got out the Fimo clay and made some beads. Ben made a robot to make into a magnet.

I'm two weeks into my no shopping challenge today and we've done really well. So far we've stuck to our plan. It's been hard at times. Mornings like this morning usually make me want to go and do something with the kids - the mall, the zoo, a trip to Sydney, DVD's from the shop. Today we did get to do things together - free things - and it was just as fun.

On buying vintage...


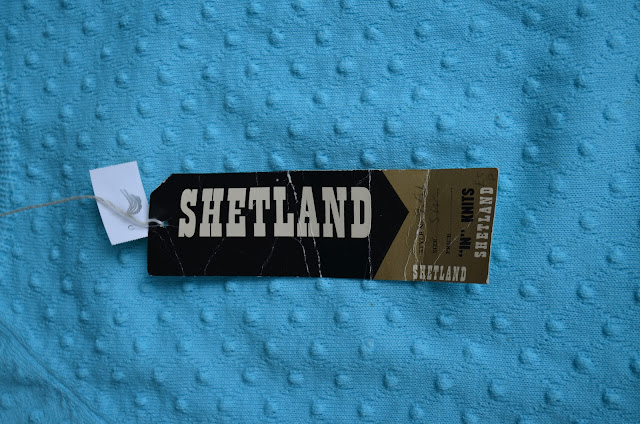
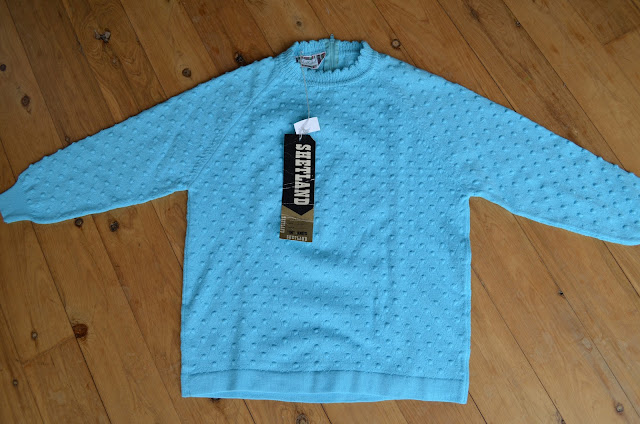
While on holiday in Orange last weekend I picked up a great little vintage sweater at the local Salvo's.  I saw the old fashioned looking label first, and when I pulled it out from the rack I was surprised to see the original tags still attached. Someone had held onto this top for more than 40 years but had never worn it. Maybe it was something she hoped she'd fit back into, or it was something that she thought was simply too pretty to throw away. I wish I could tell her that it now has a very good home with me, and that I'll look after it.

When dating vintage clothing there are a few tricks you can use. My lovely mum gave me Kelly Doust's Minxy Vintage for my birthday and in the book she has a great paragraph on 'Signs of it's era' which I will summarise for you here.


Pre 1920s - Antique
1920s - 1960s - Vintage
1970s - 1980s - Retro
1990s and later - Secondhand

*Although I know of a few young people who proudly wear their "vintage" 1990s clothing a la' Beverly Hills 90210. I myself can't cope with calling any era of clothing "vintage" when I clearly remember wearing it the first time around!

Prior to the 1940s zippers were not used in anything other than uniforms, so if it has a zipper it will be 1950s or later. A zipper on the side is likely to be 1940s where a zipper down the back is more of a 1950s trademark. Nylon zippers were invented in the 1960s so if it has a nylon zipper it can only be post 1960 (unless it's been replaced). In the 1970s overlockers were widely used. 1980s clothing looked to the 1950s so it's easy to be confused - check for overlocking and nylon zippers to determine if you've found an authentic 1950s dress or a 1980s inspired one.

So with a new book about vintage clothing in hand and two towns of undiscovered op shops waiting to be trawled through, there was really only one thing left to do. The op shops of Bathurst and Orange definitely didn't disappoint, I have never seen so much authentic vintage clothing in all my years of thrifting.


My first find was the little knit top I mentioned earlier. It has a cotton zipper placed down the back of the top - those clues plus the style of the tags make me think it's either from the 1950s or 1960s. The only problem with it was the colour. I'm not a bright sky blue kind of girl, that colour does nothing for me at all. So today, I bought some trusty clothing dye and turned it into a bright royal blue. I love how it came out, and for $4 for the top plus $9 for the dye I reckon I got a pretty good bargain.


My photographer's assistant was more interested in the trampoline than the camera this afternoon so I had to make do with a self portrait. I'll try and get a better photo this weekend when Mr J is around so you can see the shape.

My next revamp is a floor length brown and orange 60s dress that had my husband saying "Erm.. ah, I'm not even sure what to say about that...." when I excitedly popped it into my basket. Can't wait.


Ten years since

Today J was cleaning out the cupboard under the stairs. When we moved into this house we shoved everything that wasn't essential under there and most of it has remained unpacked. Over time it's become a jumble of boxes and junk so today seemed as good a day as any to have a good clear out.


Half an hour later he handed me a magazine with a smile. It took me a good few seconds to realise what he was giving me, and then I saw. It wasn't any magazine, it was my magazine. 


When I was 23 I entered a design competition through New Zealand's leading fashion magazine. The prize was Young Designer of the Year, a title I never dreamed I could possibly win. At the time I was making and selling a few A-line skirts made from remnants of designer upholstery fabric and I used the same idea in my submission. To go with the pale green floral Ralph Lauren fabric of the skirt I matched a soft peach silk that I found in an Indian shop on Auckland's K Road. I knitted a sorry looking swatch of blue wool for the cape and sent it in. A few weeks later I was walking home from the bus stop when the editor of the magazine called me and told me that I had won. I couldn't believe that my ideas had been chosen and was really excited, but the moment I hung up the phone I started to worry.

I'm a naturally shy person and the thought of having coffee with the face that looked out at me from the editors page of Fashion Quarterly made me ill. I fretted over what I should wear, what on earth I would say, how I would come across to her. The photo shoot was fun to watch, but it took hours and hours and in all of those seconds and minutes I felt incredibly awkward and like I should be more extroverted and fun. I feared they would see me as disinterested, which was the furthest thing from the truth. At the end of the day the photographer decided to shoot a couple of pictures of the model in the silk blouse I designed. It was more for fun than anything, but I remember the stylist saying that she liked it.

A couple of weeks later I received another call from the editor to say that they had chosen the photo of my blouse for the cover of the Spring issue. It was the first time they'd ever used an 'undiscovered' designer for the cover, a huge honour.


A tour of the publishing offices was my favourite part of the prize, I love to write and working for a fashion magazine was a huge dream of mine at that age. I so wanted to ask about work experience there, or at least indicate an interest in that sector of the industry - but I couldn't seem to find the words. A big part of the prize was work experience at WORLD but it never happened, mostly because I didn't push for it to happen. I was secretly relieved because the thought of being there for a week was terrifying.


For a couple of months my magazine was in all of the shops, and huge over sized covers where hanging in book store windows.

It's been 10 years since that whole whirlwind happened and I still have weird feelings about that time in my life. I wish I could have been braver and taken that opportunity with both hands. I wish I had been able to show them just how passionate I am about the industry and how I much I wanted to work for them. My regret was such that for the last few years I've avoided even thinking about my magazine and I certainly haven't wanted to look through it.

Today I decided enough was enough and it was time to sit down and have a flick through.

What did I see? I saw a fresh faced 23 year old woman, an interesting design, and some lovely comments from both the magazine and the designers who judged the competition. I saw an amazing life experience, a huge achievement, and something to show my children later on in life. I didn't see the regret any more.


So from now on I've decided I'm going to keep my magazine around where I can see it and be proud of it, not thrown in a box under the stairs. 

Lately....

One of the things I find the most fun when it comes to sewing, is reusing vintage fabrics and turning them into something entirely different. A few weeks ago I came across a kids sheet set with a Superman print from 1979. I snapped it up and have been thinking of how I could rework it into something fun for my son Ben.

A few years ago I made and sold kids jeans reworked from an adult size pair of vintage jeans and I decided to use that concept again here. Vintage denim is soft and worn in, and it's normally much better quality than the denim you can buy off the roll.

So here they are, Ben's KAPOW! jeans.


And since I've recently opened a store through my Facebook page I'm adding these little babies to the shop. 

They are:
Custom made KAPOW! jeans in sizes 12 months - 5 years made from vintage Superman fabric and recycled denim. To order please email me on mybornagaincreations@gmail.com or see the 


And while I was sewing I made a few more of my cushion covers using vintage tea towels. Most of these have a side zipper so the cushion can be used on both sides. More items are added to the store every few days so make sure you 'like' the page and check back.


South Otago New Zealand cushion made from vintage tea towel.


Floral cushion made from 100% cotton vintage tea towel.


Australian Crocs cushion made from 100% linen vintage tea towel.
(Sold)

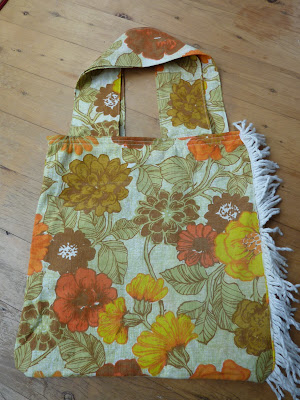
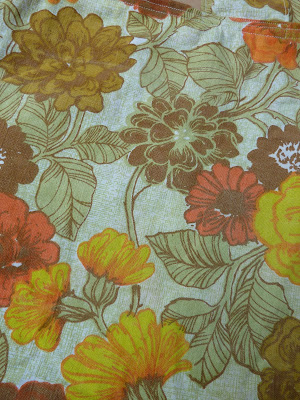
And lastly, this great Tote Bag made from 1960s floral fabric and lined with a orange and cream geometric print:


To order please see the born again creations store.

Nightgowns for Mima

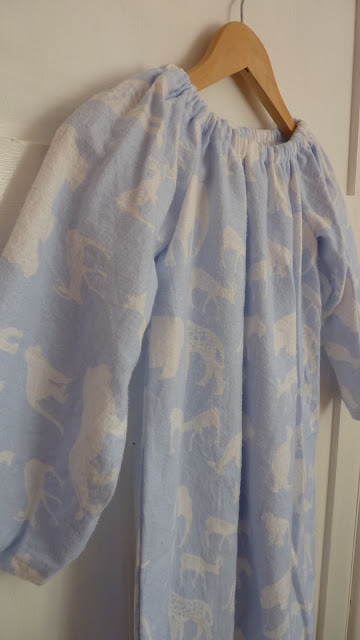
I'm embracing the colder temperatures that are coming our way at the moment. I can't wait for autumn to really hit us with it's bright cool days and beautiful orange leaves. For months now I've been squirrelling away pieces of flannel fabric for some winter projects I have in mind for the kids. Today I whipped up some nightgowns for Jemima using Butterick B4910 which couldn't be simpler to sew. 3 pattern pieces and 15 minutes and she had two new winter warmies for those cold nights ahead.


The more observant among you will see that on this one the crowns are upside down. That's me trying to fit this pattern onto a too-small piece of fabric. Note to self - if you're too budget to buy the correct amount of fabric don't get one with a repetitive print!


38. Remaking Kids Clothing

This tutorial will show you how to make two cute summer items using thrift store finds.

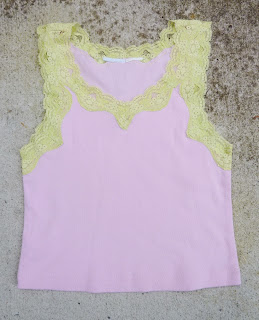
Yesterday I bought two tops for $1 each from a thrift store for Jemima including this plain yellow t shirt. For this project you'll need two circular doilies or embroidered pieces of linen.


Firstly, lay the t shirt out and cut off the sleeves. Turn the edge under and sew around the arm hole. Then take your doily and cut it in half. Place the raw edge under the arm hole of your t shirt at the shoulder and sew it on to make little capped sleeves. Be careful to make sure that the centre of your semi circle matches the neck to shoulder seam at the top of the shirt.


Take your other doily/linen piece and draw a heart shape in the centre on the wrong side of the fabric. The easiest way to do this is to draw a heart on paper and tape it to the window before laying your fabric over the top. You'll be able to see the shape through the fabric so you can trace it neatly. Cut out the heart carefully, nail scissors work well for small shapes.


Sew the circle onto the front of the t shirt then applique around the heart. I used my machine but you could do it by hand.


The other top I bought was this short little singlet top which I made into a summer dress. For this project you'll need a top, a fabric scrap for the heart shape, and some fabric for the skirt. In keeping with the love heart theme I cut a heart out of contrasting fabric and sewed it onto the front of the top using applique stitch.


For the skirt I used a scrap of leftover fabric that I had called Central Park by Kate Spain. I used the bottom part of a dress pattern but you could use either a skirt pattern, or just wrap a piece of fabric around the waist 1.5 times. Once the skirt was sewn I gathered the top.


Next turn the top inside out and lay it over the skirt so that the right sides are together. The hem of your top should meet the top waist section of your skirt. Pin it in place (adjust gathering as you need to) and sew around. This is the same technique that I used when I remade a 1980s dress in this post: remaking vintage clothing.

When everything is turned the right way around sew a top stitch around the skirt waist. Press the seam then finish the skirt by sewing the hem.


36. Vintage Baby Bibs

Bad Auntie Alert. These bibs are for my newest nephew Max who was a Christmas baby. As you can see, they're a little late. Better late than never though, and I love the way they turned out.

I found a 1.2m square Fiji souvenir table cloth at a thrift store late last year.  The worn soft cotton is the perfect thing for catching those inevitable baby spills.

I wish I'd made some vintage bibs when my own two kids where babies but really, at that stage of my life cutting up an old tablecloth and fashioning it into a bib was the least of my concerns. Which is why these make the perfect gift!

I used a basic bib pattern but they're so simple you could draw one yourself. All you need to do is make a rectangle then round the corners and draw a curve for the neck. I sewed mine right sides together leaving the neckline open so I could turn them out. Then I sewed along the neckline and added some bias binding tape for the ties. Before you turn it out clip the curved edges a bit with some scissors so they sit nicely and don't have bulky corners.


Little Max's Grandma grew up in Fiji and there have always been stories about life in Suva and paintings of Fiji around. So when I saw this fabric I knew where it belonged.

Bula!

LinkWithin

Related Posts Plugin for WordPress, Blogger...