Showing posts with label Vintage Finds. Show all posts

Shop Your Style Icon


For me, it's always been Audrey. There's nobody past nor present as effortlessly elegant or poised as she. Somehow the simplest of silhouettes look stunning on her. Never too little, never too much.

Today I'm going to show you how to incorporate some iconic style your very own wardrobe. All that's involved is a bit of research and a critical eye. Ready? Let's go!

Research

If your style icon is a film star you must have an all-time favourite movie that they star in. Your first step is to look at images, television series, or films and take note of what you love. Look at colours, make up, jewellery, hair cuts, bags, shoes, and hem lengths. Is there anything characteristic that ties it all together? Make some notes as you go, or start up a Pinterest board for inspiration.


This is Audrey in the 1953 film Roman Holiday. When I saw it recently I was drawn to the pockets in her full skirt, the wide belt that cinches in the narrowest part of her waist, and the strong collar of her shirt. I love that little scarf at her neck too.


Hello cigarette pants! In the second picture she has another strong structured collar. She's wearing ballet flats - I told you she was my kind of woman.


In this photo we've got shorts with a patterned shirt, again with some structure to it - especially in the cuffs.

Be Critical

So now we have a good sense of our style icon but how do you actually wear it? This is where a critical eye comes in. Obviously I am not Audrey Hepburn. You're not your style icon either. And that's awesome because what we want is for your style to come through here. If I walked around in a black dress and enormous sunglasses with my hair piled high and a cigarette holder hanging out of my mouth people would point at me. The idea isn't that you look like you're off to a costume party.

If your style icon is a skinny minny and you're not it doesn't matter one bit. You can still incorporate their style into your look. Maybe it's some stiletto heels with a splash of colour like Carey from Sex and the City, or black eye-liner and pale lips with a wide necked off the shoulder t-shirt like Brigitte Bardot. Perhaps it's a red lip and some sparkles like Marilyn Monroe, or some tailored pants and a sharply tailored shirt reminiscent of Katharine Hepburn.

Pick what you can get away with and be honest about what you can't.

Find the Goods

Let's look at Audrey.

As you know I'm a huge fan of thrift shopping. You can find some wonderful things for next to nothing in thrift stores, but it's all a game of chance. If you're after specific pieces try eBay or Etsy's vintage clothing sections. You'll pay more, but you'll find exactly what you're after and remember, vintage is still much cheaper than new.


A patterned cigarette pant is a great 1950s look teamed with a cardigan in a block colour and a crisp white blouse. Here are some vintage finds I saw on Etsy today:

1950s Cigarette Pant by Vintage Salvation on Etsy.


1950s pants by Maybel57 on Etsy
Match it with a simple vintage top:

1950s Blouse by VintageBoxFashions on Etsy.


Or a fitted white shirt:

Asos fitted shirt from Asos.com
If you can't find a vintage pant there are new options on websites like Asos:

River Island Printed Cigarette Trouser from Asos.com
Or reproduction pieces on websites like Collectif:

Bonnie Blackwatch Cigarette Trousers from Collectif.
If a patterned pant is too much for you swap it up by having a plain coloured pant and a patterned shirt.

1950s shorts by Allencompany on Etsy.

1950s shorts by Camp Bettie on Etsy.
Asos Luxe stripe tee from Asos.com.
The aim here is to find pieces that have the flavour of your style icon - they don't have to match exactly. I love everything about Audrey (except all of those cushions and bags with her face printed on them) but for you it might be Twiggi, or Madonna in her Desperately Seeking Susan phase. Maybe it's the 1940s that tickle your fancy, or 1980s shoulder pad glam. Whatever it is, don't be afraid to incorporate it into your wardrobe. Fashion is meant to be fun!

Blue Mountains Vintage Trail

An Insider’s Guide to finding bargains in the Blue Mountains

Whether you’re looking for clothing, retro homewares, a piece of mid-century furniture or that last elusive item to finish off your collection, the Blue Mountains is the perfect place to spend a day exploring the many vintage stores on offer.  Follow me on my perfect day out doing the ‘op shop hop’ from Glenbrook in the Lower Mountains to Blackheath at the very top.


  Blue Mountains Australia
  • Start at Glenbrook village, the gateway to the Blue Mountains and just 10km west of Penrith. Fuel up with a coffee at one of the many quirky cafes such as Jazz Apple or the recently opened 2773. When you’re ready to hit the shops stroll down Ross Street to the local Vinnie’s where you’ll find a small thrift store that has a good selection of clothing and homewares. On your way back up Ross Street make sure you check out Frippery, an op shop that specialises in vintage clothing.

  •  Heading west up the Great Western Highway to Blaxland you’ll find Vinnie’s on the main road. If you park behind the shops you’ll see that this Vinnie’s has an extensive furniture section downstairs with some great bargains to be had. Upstairs you’ll find clothing, manchester, homewares and jewellery. Back out on the main road there is a small Bibles for Missions op shop where prices are cheap and there are many treasures waiting to be discovered. Make time to stop for a chat with the friendly and knowledgeable volunteers.
  •  The next stop is Springwood where a newly opened Salvos has a large range of clothing, kitchen items and electronic goods. Stop in the shops for a snack or head straight to the Vinnie’s on Macquarie Road.

  • It’s time to make our way to Katoomba where we’ll be spending a couple of hours visiting some of the best op shops in the mountains. Start at Salvos located on Waratah Street down a steep driveway. There are often great furniture sales at this store as well as a good range of clothing, shoes, kitchen items and linen. Keep walking down Waratah Street and you’ll come across Vinnie’s which has an upstairs area full of linen and craft items as well as a separate room for furniture. Just past Vinnie’s is the Cat Defence Charity Shop, a small thrift store bursting with vintage homewares.  Head back up Waratah Street towards Katoomba Street where you’ll find an abundance of cafes and restaurants. This is the perfect place to put down those shopping bags and take a break over something good to eat. Suitably refreshed, take a stroll up Katoomba Street visiting the many antique shops along the way. One of my favourites is Macarthur Arcade which boasts a huge selection of vintage homewares and mid-century furniture. Once you reach the top of Katoomba Street carry on past the round-a-bout to Bathurst Road where you’ll find the Boutique Op Shop. This op shop is a recent addition to my regular hit list. I love the care the staff take in displaying their items and the great range they have on offer.


  •   The last stop on our Vintage Trail is Blackheath just west of Katoomba. Start at the Vinnie’s just across the railway tracks before walking down Govetts Leap Road to the Victory Theatre Antique Centre and CafĂ©.  This enormous antique shop contains two floors of homewares, clothing, jewellery, furniture and porcelains and more. There is always something wonderful to discover here. Finally, pop in to one of Blackheath’s many cafes for one last top up before heading home, hopefully with your arms full of vintage finds! 

Trail Notes
·       Most op shops are closed on Sunday so make sure to check the opening hours online before you plan your trip
·       Carry some cash with you as many op shops don’t accept cards
·       All of the shops listed in this guide as located close to Railway Stations so you can utilise public transport


Olive Oil and Beeswax Wood Polish


Every now and again a roadside or op shop find needs a bit of TLC. A couple of weekends ago we drove past a gorgeous 1975 Parker Cabinet that had been put out for the council clean up collection. Of course, we went back (and spent the rest of the day getting it home in pieces in our little car!). It was in great condition except that the wood was dehydrated and had turned a pale sand colour, so different from the rich teak colour that's typical of Parker furniture.

After a bit of research I made up my own wood polish and set to work on the cabinet. The recipe couldn't be easier - two ingredients! And this polish works. Your wood will be glossy and nourished and your hands will receive a nice moisturising treatment in the process.


Today I decided to tackle a 1970s Chiswell table that we bought for $30 a couple of years ago on eBay. We always meant to strip it back and repolish it but it never happened. In addition to it's 40+ years of grime we've added pen, glue, food, and paint to the table top since we've owned it thanks to the kids. It was time for a clean.

The first thing I did was clean the top using warm soapy water and steel wool, following the direction of the grain. Then I gave it a couple of rinses and two spray/wipes with my home made cleaner. After it had dried completely I grabbed a scrap of flannel fabric and began working the polish into the wood. As you can see, the wood was very dry and looking at bit worse for wear.


Once you have applied the polish you can leave it to soak in for a while or buff it straight off using a clean soft cloth.

You can see the difference the polish makes straight away:


And here's the finished table top - I think I'll do another couple of coats in the next couple of weeks just to make sure the wood is really protected.

BEFORE:


AFTER:


And here is the freebie Parker that we found, all polished up using the same polish:


If you'd like to make your own wood polish the recipe is super simple.

Get a small glass jar and fill it with some olive oil. Place it in a pot that has water simmering in it, you want the water to come up the side of the jar about 1/3 - 1/2 - not too far because you definitely don't want any water coming in the top. Add some beeswax (I used a piece of an old candle) the ratio is about 4 parts oil to 1 part wax. Melt the beeswax into the oil until it's completely dissolved. Take it out of the water carefully and allow it to cool down. It will set to a thick paste.

Have fun polishing :)

On buying vintage...


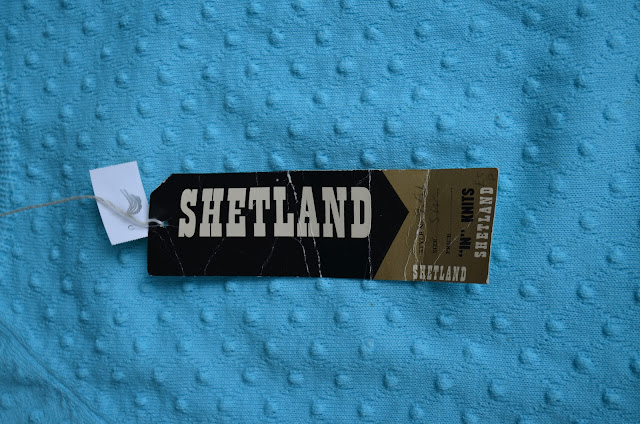
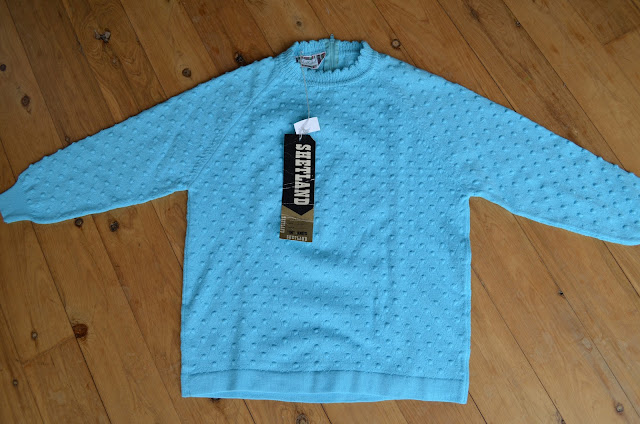
While on holiday in Orange last weekend I picked up a great little vintage sweater at the local Salvo's.  I saw the old fashioned looking label first, and when I pulled it out from the rack I was surprised to see the original tags still attached. Someone had held onto this top for more than 40 years but had never worn it. Maybe it was something she hoped she'd fit back into, or it was something that she thought was simply too pretty to throw away. I wish I could tell her that it now has a very good home with me, and that I'll look after it.

When dating vintage clothing there are a few tricks you can use. My lovely mum gave me Kelly Doust's Minxy Vintage for my birthday and in the book she has a great paragraph on 'Signs of it's era' which I will summarise for you here.


Pre 1920s - Antique
1920s - 1960s - Vintage
1970s - 1980s - Retro
1990s and later - Secondhand

*Although I know of a few young people who proudly wear their "vintage" 1990s clothing a la' Beverly Hills 90210. I myself can't cope with calling any era of clothing "vintage" when I clearly remember wearing it the first time around!

Prior to the 1940s zippers were not used in anything other than uniforms, so if it has a zipper it will be 1950s or later. A zipper on the side is likely to be 1940s where a zipper down the back is more of a 1950s trademark. Nylon zippers were invented in the 1960s so if it has a nylon zipper it can only be post 1960 (unless it's been replaced). In the 1970s overlockers were widely used. 1980s clothing looked to the 1950s so it's easy to be confused - check for overlocking and nylon zippers to determine if you've found an authentic 1950s dress or a 1980s inspired one.

So with a new book about vintage clothing in hand and two towns of undiscovered op shops waiting to be trawled through, there was really only one thing left to do. The op shops of Bathurst and Orange definitely didn't disappoint, I have never seen so much authentic vintage clothing in all my years of thrifting.


My first find was the little knit top I mentioned earlier. It has a cotton zipper placed down the back of the top - those clues plus the style of the tags make me think it's either from the 1950s or 1960s. The only problem with it was the colour. I'm not a bright sky blue kind of girl, that colour does nothing for me at all. So today, I bought some trusty clothing dye and turned it into a bright royal blue. I love how it came out, and for $4 for the top plus $9 for the dye I reckon I got a pretty good bargain.


My photographer's assistant was more interested in the trampoline than the camera this afternoon so I had to make do with a self portrait. I'll try and get a better photo this weekend when Mr J is around so you can see the shape.

My next revamp is a floor length brown and orange 60s dress that had my husband saying "Erm.. ah, I'm not even sure what to say about that...." when I excitedly popped it into my basket. Can't wait.


Hello 34!


I turned another year older on Sunday and to celebrate we went on a mini holiday to the Central West region of NSW. We rented a holiday house on a farm in between Bathurst and Orange where there was nothing but pastures, blue sky, and the sounds of cattle mooing happily to one another. It was a long weekend that almost didn't happen, thanks to an ill timed throat, sinus and ear infection on my part. The morning of my birthday I felt slightly better (thank you antibiotics!) and so off we went.


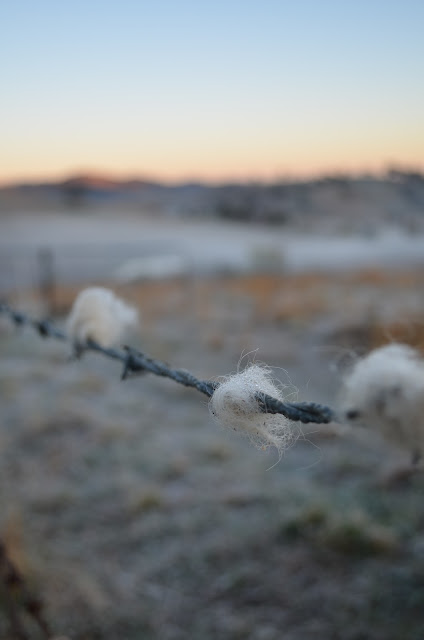
The house was warm and comfortable overnight so it was a surprise to wake up to a heavy frost on Monday morning. The kids were awake and playing (loudly!) at 6am so I took advantage of being up early and headed outdoors. It was crisp and icy out there so early, but the sun was warm and the frost melted away fast. The best thing about the country is the quiet. That morning there was nothing for miles but me, a big blue sky, and the sound of my boots crunching through the grass.


One thing I wanted for my birthday was to get away from the rush that has been our lives lately, and slow right down. We had three televisions in the holiday house but we decided that the kids would be screen free. They inevitably asked about the TV when we arrived, and I told them things were different in the country and it only played the news! A bit of a white lie but it worked.

Instead of watching TV we made up puppet shows using their teddy bears that had the children crying with laughter. We got the kids out of bed after dark to go outside and look at the stars. We organised a much anticipated "midnight" feast and played lots of music.

We drove through little towns and made a detour to Millthorpe. After a picnic in the old cemetery we played a game of "who can find the oldest gravestone" and Jemima and I disturbed an enormous snake that was snoozing in the sun. Ben won the game (1890) despite not being able to read, which was met with much amazement and congratulation by Jemima. The kids loved these little things, having mum and dad play with them and be silly. It's something we need to work on incorporating into our every day lives I think.


And then of course there was a whirlwind tour of the Op Shops in Bathurst and Orange. I found some amazing things including some 1960s clothing with the tags still attached! I'll be writing about those later but here's a photo of some Pyrex I found for $1.50 each.


A quilt for Jemima

Last Friday my lovely Jemima turned 8 and following our family tradition of giving at least one home made gift I was happy to finally hand over her quilt.


I started the quilt topper back in February when the cold nights of winter seemed far away indeed. I used a mix of Heather Ross fabrics and some vintage pieces I had collected from thrift shops over a  period of a few months. I had the squares sewn together in a couple of days. And then it sat, for 5 months, in my craft cupboard where it would look at me accusingly every time I reached inside to grab something. I borrowed beautiful books on quilting from the library and watched many a YouTube tutorial but I could never gather up enough motivation to finish it.


On a craft shopping trip a couple of weeks ago I decided on impulse to get it finished for Jemima's birthday and I bought the cotton and wool wadding there on the spot. What I didn't really think about at the time was that it was school holidays, meaning zero secret squirrel sewing time. The week before the big birthday was a rush of party planning, school holiday entertaining, and stolen minutes furiously stitching downstairs when I thought no one would notice. I really had no idea what I was doing, and as it's my first quilt I wanted to learn as I went. I started with some machine quilting (with no walking foot, which I will never attempt again), then I made some bias binding which I hand stitched on, and finished with some tying.


It's not perfect. It's no where near perfect. But it's made with love and Jemima adores it, which is all that really matters in the end. 

Things I discovered:
  • If they ever decide to canonise people for Craft Sainthood my younger sister should be first in line. She single-handedly machine quilted a queen size quilt for our mum last month on her little Brother machine, on a small kitchen table, with no walking foot. And it looked amazing.
  • You can't have too many safety pins basting the whole deal together. 
  • Cut the backing fabric and wadding bigger than the top. Trust me.
  • Even if you can see all of the imperfections and ugly bits, it's likely that no-one else can.
  • And.. quilting makes me swear like a sailor. That's all.


44. Hot Water Bottle Cover made from Recycled Jumper


A couple of weeks ago I flew to Wellington to celebrate my mum's 60th birthday. I arrived late at night and as the terminal doors opened I was met with an icy blast to the cheeks. Nearly 3 years in Sydney has made me soft and I was ill prepared for just how cold Wellington can be in June. When we arrived back at my sister's house I saw that she had made up a cosy bed for me. Being our mother's daughter, she had popped a hot water bottle under the covers so that the bed was extra warm. Wrapped around the hot water bottle was a nifty little cover she had fashioned out of a woollen jumper. Yes, recycled crafty goodness runs in the family! As I was packing to go home again she gave me this very cute vintage wool jumper with a Panda bear on it. She had planned to use it for another project but thought my Ben might like it. As it turns out, it was a little tight on Ben, and after these photos were taken he said "Mum can I take it off right now?"  so I knew it wasn't going to be a winner.

So this morning I decided to turn it into a hot water bottle cover just like my little sis did. Here's how to make one yourself:

You'll need:

1 hot water bottle either mini sized like mine or full size
1 vintage wool jumper
Buttons
Thread


The first thing I did was lay my hot water bottle over the jumper to get the position right. Then I drew around the shape with a pen, making sure the line was at least 2.5cm away from the edge of the bottle.


The neck was left straight because we're going to use a cuff for the neck part later on. Once it was cut out I turned it inside out (right sides together) and overlocked it all around, leaving the neck and bottom edge open. Then I stitched it on my normal sewing machine for extra strength.


The neck piece is made from one of the cuffs. I cut it off and overlocked the edge before sewing it around (again, right sides together). The bottom was closed using three buttons that were on the jumper but you could insert the hot water bottle and hand stitch the opening closed, or use ties if you like.


Mr Ben was pretty happy with it. This project took around 15 minutes to complete, perfect for a quick craft on a winters day.

LinkWithin

Related Posts Plugin for WordPress, Blogger...