Showing posts with label Sewing. Show all posts

Chair Pads


Today I picked up four of these chairs from a garage sale:


We needed new chairs. Bad. When we arrived in Australia four years ago we bought the cheapest dining chair Ikea sold, which for the record was about $12 each. They lasted pretty well for a $12 chair but a few months ago the last one broke. We've been sitting on a mixture of broken chairs and a stool while we discussed what kind of chairs we wanted to purchase next. What we really want are Emeco chairs but since we're on a budget and are saving for a house it felt like a frivolous purchase. So then we debated buying second hand retro chairs, like Parker ones if we were lucky. But we already have a Chiswell dining table and a Parker sideboard in that room and we didn't want to be too retro. Finally the decision was made yesterday when I spotted four of these replica Eames chairs on a garage sale website. They were $90 for four, which is a great deal. They won't be our forever chairs, but they were the right price and they'll do until we can afford the Emeco ones we really love.

The only problem with them is that they need a chair pad. They're quite comfy on their own if you don't have a bony behind like I do. For me, I need the cushion. This afternoon I whipped up four chair pads out of some fabric I had. Here's how to make some yourself:


This is my fabric. Amazing, 1950s - 60s thick cotton that was once used as a cover for sunroom furniture. I bought a huge piece for $5 from an op shop two years ago.


I found a pot lid about the size I needed and used that as a template to cut out the circles for the chair pads. I added about 1.5cm all around for a seam allowance. I have four chairs so I cut out 8 circles for the front and back pieces.


Next I cut four pieces of cotton tape to use as a tie. I didn't want ties showing at the back of the chairs so I sewed them underneath. The wire design of the chair means I could tie it from the bottom instead of the back.


With right sides together I sewed around the edge, leaving a gap for the stuffing.

I then turned them out the right way and folded the circles in half and then in half again. I marked the point with a pen (this will be the centre of the circle). I then stitched a piece of cotton tape in the centre spot making sure to go over the stitching at least twice. I did this before stuffing because I wanted the chair pads to have some depth and an almost tufted look.


Next step was to stuff each one with hobby fill stuffing. I then pinned the open edge and sewed it stuff. 


Super easy and took only about 15 mins once they were cut out. Total cost was $10 for the hobby fill and the cotton tape. They were so easy to do I might even make more. Could I become a woman who changes her chair cushions to match the season? I easily could.


A New Year and Some Sewing

Happy New Year!

I've started the year with a spring clean, updating photo albums, editing my end of year home movies and very little sleep.

In November I took a solo trip to Ubud in Bali for a week. My goals for the trip were to eat, sleep, go to the spa and buy fabric. A perfect holiday! I took a day trip to Denpasar to the fabric markets and brought back lots of lovely stuff. I also couldn't help myself and ended up with 11 sarongs.. but those are slowly getting turned into clothing or things for the house too. I made up the pattern for the shorts in the bottom picture but there are plenty of free PDF patterns about on the Internet. These ones are very simple with just a zipper up the back, and they're quite high waisted. I used the rest of the fabric to make Jemima a pair, but hers are below the knee and wide in the leg.

I have a few sewing projects on the go at the moment, and all going well I'll have some time to photograph them and upload them here soon. Have a lovely day everyone.


A quilt for Jemima

Last Friday my lovely Jemima turned 8 and following our family tradition of giving at least one home made gift I was happy to finally hand over her quilt.


I started the quilt topper back in February when the cold nights of winter seemed far away indeed. I used a mix of Heather Ross fabrics and some vintage pieces I had collected from thrift shops over a  period of a few months. I had the squares sewn together in a couple of days. And then it sat, for 5 months, in my craft cupboard where it would look at me accusingly every time I reached inside to grab something. I borrowed beautiful books on quilting from the library and watched many a YouTube tutorial but I could never gather up enough motivation to finish it.


On a craft shopping trip a couple of weeks ago I decided on impulse to get it finished for Jemima's birthday and I bought the cotton and wool wadding there on the spot. What I didn't really think about at the time was that it was school holidays, meaning zero secret squirrel sewing time. The week before the big birthday was a rush of party planning, school holiday entertaining, and stolen minutes furiously stitching downstairs when I thought no one would notice. I really had no idea what I was doing, and as it's my first quilt I wanted to learn as I went. I started with some machine quilting (with no walking foot, which I will never attempt again), then I made some bias binding which I hand stitched on, and finished with some tying.


It's not perfect. It's no where near perfect. But it's made with love and Jemima adores it, which is all that really matters in the end. 

Things I discovered:
  • If they ever decide to canonise people for Craft Sainthood my younger sister should be first in line. She single-handedly machine quilted a queen size quilt for our mum last month on her little Brother machine, on a small kitchen table, with no walking foot. And it looked amazing.
  • You can't have too many safety pins basting the whole deal together. 
  • Cut the backing fabric and wadding bigger than the top. Trust me.
  • Even if you can see all of the imperfections and ugly bits, it's likely that no-one else can.
  • And.. quilting makes me swear like a sailor. That's all.


Homemade Handkerchiefs


Each year as winter approaches and with it runny noses I'm a little alarmed at the number of tissues we all go through. We're raising our kids with an awareness of sustainable living and caring for the planet that we live on, but somehow the tissue situation is something we've let slide. This year I decided that surely, I can do better.

Somewhere in the back of my mind I remembered a little handkerchief bag in a craft book I had, and this morning I rifled around the bookcase until I found it. It was Amanda Soule's 'Rhythm of the Family'.

I used a vintage pillow case that I've been saving for the bag and some flannelette scraps for the hankies. Flannelette is perfect because it's soft and thick. Vintage is even better because it's nicely worn in, helping the absorbency of the cloth.

The bag is a simple design - two pieces for the front and two for the back with a zipper so you can insert a pile of handkerchiefs from behind.  For more info on making one see Soulemama.


To make the handkerchiefs cut out 30cm (12 inch) squares of fabric, 2 pieces for each hanky. Sew around the edges with right sides together, leaving a small gap so you can turn it the right way out. Clip the corners and turn, then press well. Top stitch around the edges folding under the raw edge and closing the gap that you left to turn the hanky out. If you like you can add details such as embroidery or applique to one of the pieces of the fabric before you begin sewing. Wash hankies in hot water with a drop of tea tree oil which acts as a natural antiseptic.


Perfect for delicate little noses and kind to the planet too.

x Bec


Bibs for Baby


I've been busy in the workroom over the last couple of days making baby bib patterns and going through my vintage fabrics. When my own babies were small they didn't have bibs like these. They had pretty cheap and nasty ones. And now that I have this lovely soft little stack of baby bibs next to me, oh, I really wish I had made them bibs like these.

These bibs are recrafted from tablecloths, pillow slips, cushion covers, and remnants of fabric. It's my favourite way to sew. You can turn just about anything into a baby bib I've discovered. They're lovely and quick to work up too which is always nice.

The first series of bibs have a simple cotton tie around the neck but I'm already working on patterns for either a velcro or dome fastening. The next series will also incorporate some vintage terry towelling on the backs for extra absorption.


If you'd like to purchase one of my vintage baby bibs go to my Facebook page born again creations and visit the store photo album. Non Facebook members can order by emailing me on mybornagaincreations@gmail.com.

For instructions on how to make a baby bib yourself see my Vintage Baby Bib post.

Enjoy!

Vintage Party Dress (a la Fraulein Maria)


I had my own "Nothing but old drapes!!!" moment this morning as I cut out this dress. Well OK, it was a tablecloth not a pair of curtains, but there was something about the floral and geometric print and the craftiness of it all that made me feel like Fraulein Maria herself. It was so fun that I think I might have to make another one. Perhaps a Sound of Music dress for the born again creations store soon?

Next weekend Miss J's bestie is having a garden themed birthday party.  I've already made the birthday girl a peony print tea dress for the big day and of course, Miss J must have something equally pretty to wear too. There has to be some advantage to having a mother who is constantly hunched over a sewing machine hasn't there?

This morning I gathered together some of the vintage pieces of linen that I've been collecting over the last few weeks with this dress in mind.

The pattern I used was based roughly off a dress in Juno Okawa's beautiful book Carefree Clothes for Girls.


I've made a few things from this book for Miss J. I love the simple no fuss designs made for active little girls.

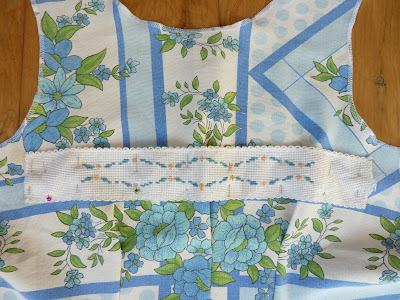
The main fabric of the dress is made from a 1960s blue print tablecloth that I picked up for $3.00.  The sleeves are made from an oval shaped piece of applique' linen cut into halves, and there is a small piece of embroidery used on the front of the dress.

Blue tablecloth approx 1.2m square

Pieces of linen bought for 50c a piece (oval has been cut in half)

I added three pleats to the front

Before sewing the seam I added a pleat on each side of the
centre seam. I also used a zipper up the top.
Piece of embroidery that was stitched to the front
The sleeves were added following the same method that I used when I remade some t shirts with doilies in this post. This week I'll make a petticoat to go underneath out of an embroidered tablecloth I have and some tulle. It important after all, to have the right amount of poofiness!

All up it was an hour from start to finish. It's sweet and pretty, and a little bit different. Just like my girl.

(This is my first embedded slideshow. To go through the photos again after they've finished hover over the bottom of the window and you should see arrows to skip through the photos).

Lately....

One of the things I find the most fun when it comes to sewing, is reusing vintage fabrics and turning them into something entirely different. A few weeks ago I came across a kids sheet set with a Superman print from 1979. I snapped it up and have been thinking of how I could rework it into something fun for my son Ben.

A few years ago I made and sold kids jeans reworked from an adult size pair of vintage jeans and I decided to use that concept again here. Vintage denim is soft and worn in, and it's normally much better quality than the denim you can buy off the roll.

So here they are, Ben's KAPOW! jeans.


And since I've recently opened a store through my Facebook page I'm adding these little babies to the shop. 

They are:
Custom made KAPOW! jeans in sizes 12 months - 5 years made from vintage Superman fabric and recycled denim. To order please email me on mybornagaincreations@gmail.com or see the 


And while I was sewing I made a few more of my cushion covers using vintage tea towels. Most of these have a side zipper so the cushion can be used on both sides. More items are added to the store every few days so make sure you 'like' the page and check back.


South Otago New Zealand cushion made from vintage tea towel.


Floral cushion made from 100% cotton vintage tea towel.


Australian Crocs cushion made from 100% linen vintage tea towel.
(Sold)

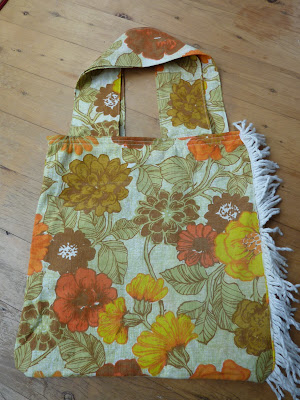
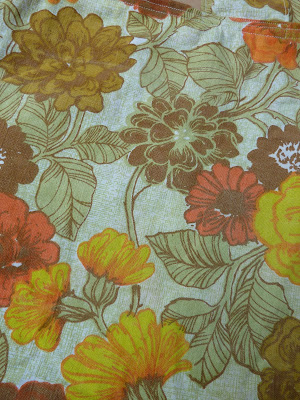
And lastly, this great Tote Bag made from 1960s floral fabric and lined with a orange and cream geometric print:


To order please see the born again creations store.

Nightgowns for Mima

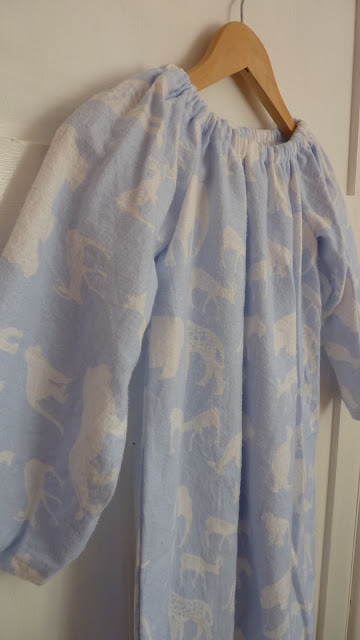
I'm embracing the colder temperatures that are coming our way at the moment. I can't wait for autumn to really hit us with it's bright cool days and beautiful orange leaves. For months now I've been squirrelling away pieces of flannel fabric for some winter projects I have in mind for the kids. Today I whipped up some nightgowns for Jemima using Butterick B4910 which couldn't be simpler to sew. 3 pattern pieces and 15 minutes and she had two new winter warmies for those cold nights ahead.


The more observant among you will see that on this one the crowns are upside down. That's me trying to fit this pattern onto a too-small piece of fabric. Note to self - if you're too budget to buy the correct amount of fabric don't get one with a repetitive print!


38. Remaking Kids Clothing

This tutorial will show you how to make two cute summer items using thrift store finds.

Yesterday I bought two tops for $1 each from a thrift store for Jemima including this plain yellow t shirt. For this project you'll need two circular doilies or embroidered pieces of linen.


Firstly, lay the t shirt out and cut off the sleeves. Turn the edge under and sew around the arm hole. Then take your doily and cut it in half. Place the raw edge under the arm hole of your t shirt at the shoulder and sew it on to make little capped sleeves. Be careful to make sure that the centre of your semi circle matches the neck to shoulder seam at the top of the shirt.


Take your other doily/linen piece and draw a heart shape in the centre on the wrong side of the fabric. The easiest way to do this is to draw a heart on paper and tape it to the window before laying your fabric over the top. You'll be able to see the shape through the fabric so you can trace it neatly. Cut out the heart carefully, nail scissors work well for small shapes.


Sew the circle onto the front of the t shirt then applique around the heart. I used my machine but you could do it by hand.


The other top I bought was this short little singlet top which I made into a summer dress. For this project you'll need a top, a fabric scrap for the heart shape, and some fabric for the skirt. In keeping with the love heart theme I cut a heart out of contrasting fabric and sewed it onto the front of the top using applique stitch.


For the skirt I used a scrap of leftover fabric that I had called Central Park by Kate Spain. I used the bottom part of a dress pattern but you could use either a skirt pattern, or just wrap a piece of fabric around the waist 1.5 times. Once the skirt was sewn I gathered the top.


Next turn the top inside out and lay it over the skirt so that the right sides are together. The hem of your top should meet the top waist section of your skirt. Pin it in place (adjust gathering as you need to) and sew around. This is the same technique that I used when I remade a 1980s dress in this post: remaking vintage clothing.

When everything is turned the right way around sew a top stitch around the skirt waist. Press the seam then finish the skirt by sewing the hem.


LinkWithin

Related Posts Plugin for WordPress, Blogger...